
Customer Chat Plugin adds a floating Messenger chat widget to your website. Path: Facebook Tools → Bot Manager → Page → Messenger Engagement → Customer Chat Plugin.
Before you start
- Enable Bot Connection.
- Prepare short greetings (UI often caps ~80 characters).
- Pick a theme color that matches your site.
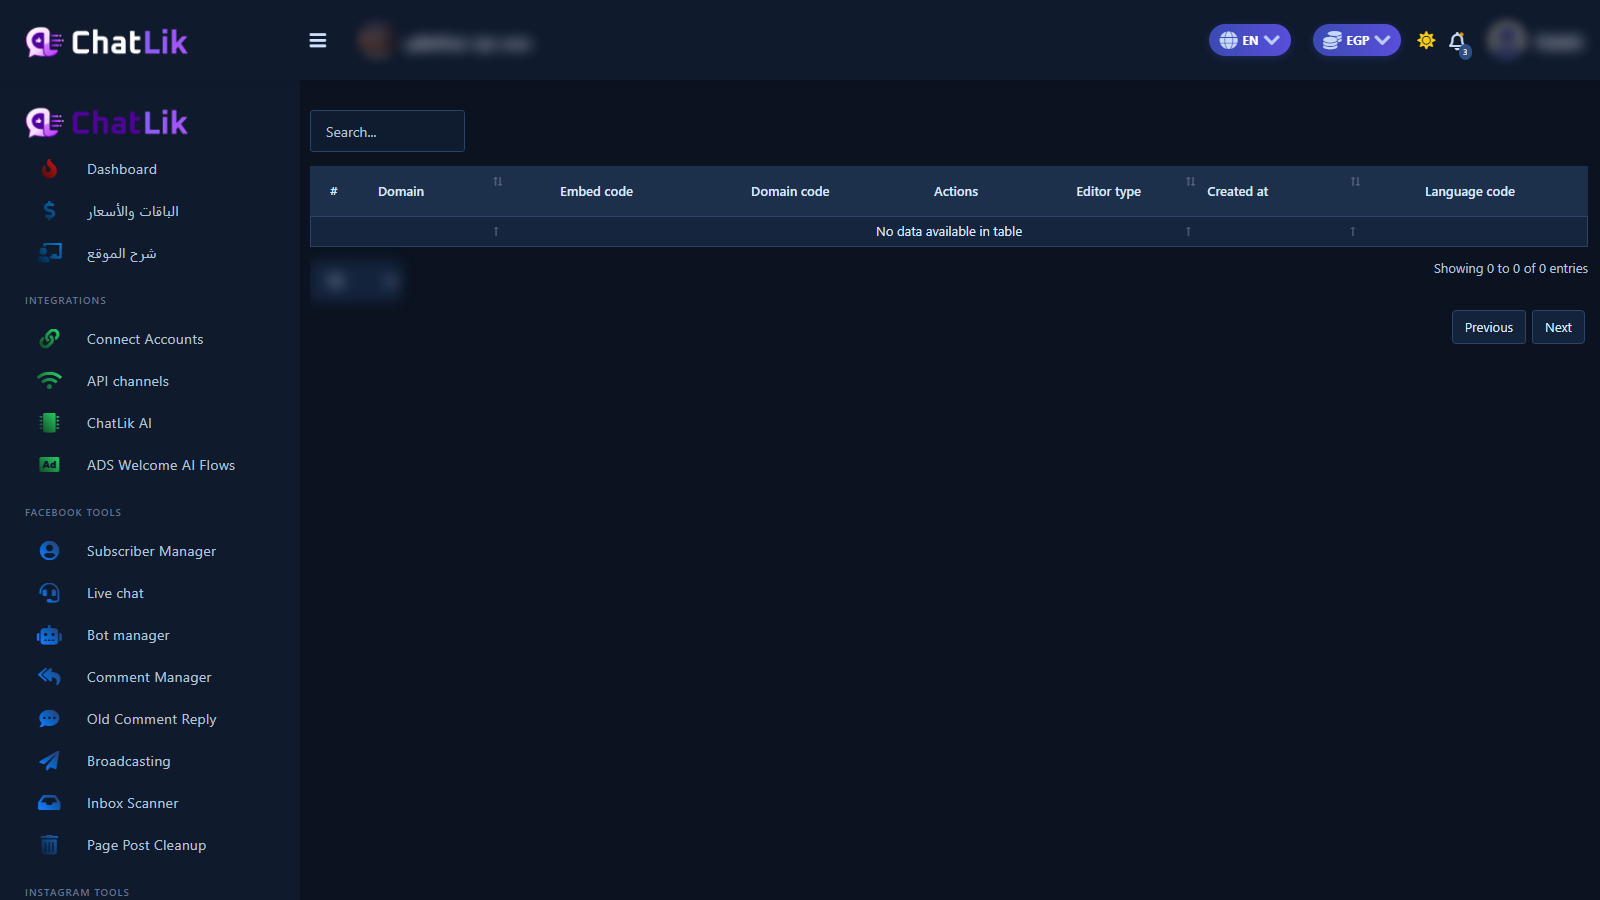
1) Open the plugin list
- Open Customer Chat Plugin.
- Review the table or create a new entry.
2) Configure the form
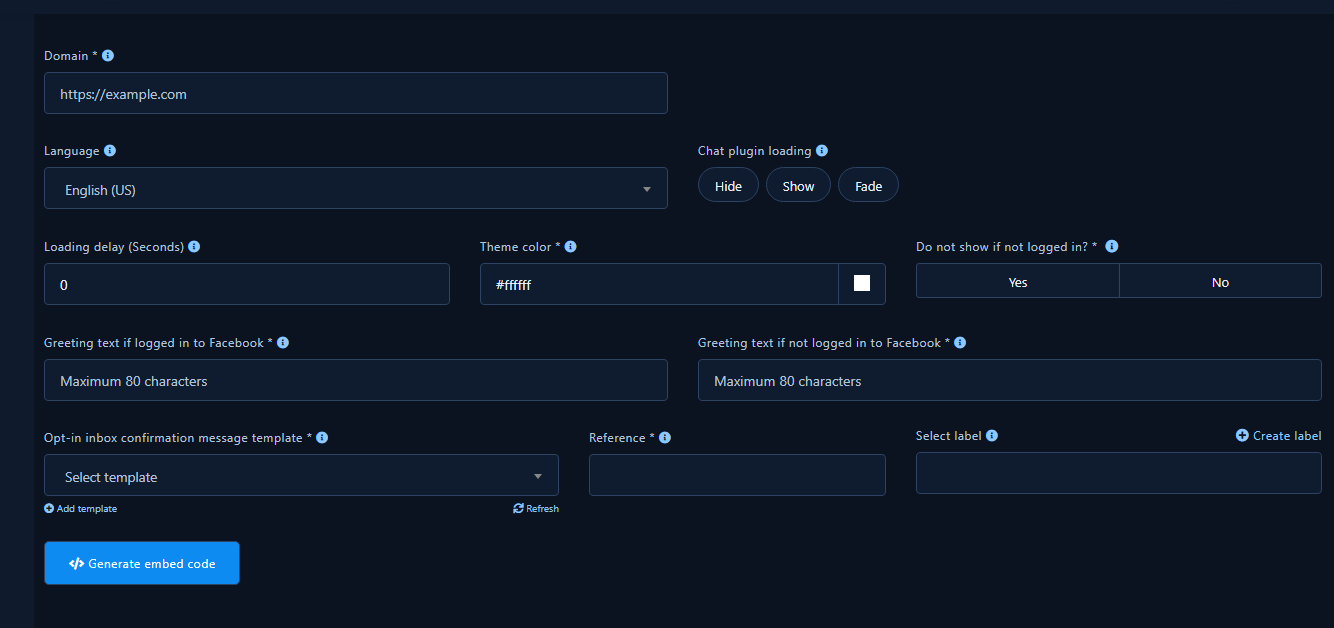
- Set domain, language, and load behavior.
- Set delay, theme color, and logged-in visibility.
- Write logged-in / logged-out greetings.
- Pick a confirmation template, then Generate Embed Code.
3) Publish and test
- Paste the embed code and publish.
- Verify the widget opens Messenger for the correct Page.
Practical tips
- Keep greetings short.
- Test as a logged-out Facebook visitor.
- Do not confuse with Checkbox Plugin.
Common mistakes
- Domain mismatch vs the live site host.
- Leaving a required confirmation template empty.
- Testing only on localhost.


