
The Messenger Get started button appears the first time someone opens a chat with your Facebook Page. Tapping it sends the welcome reply you configured. In ChatLik you use two places inside Bot manager: Get started settings (status + short welcome), then the full Get-started Template via Action button settings or Edit get started reply in the Visual Flow Builder. This is Facebook/Messenger only — Instagram uses Ice breakers instead.
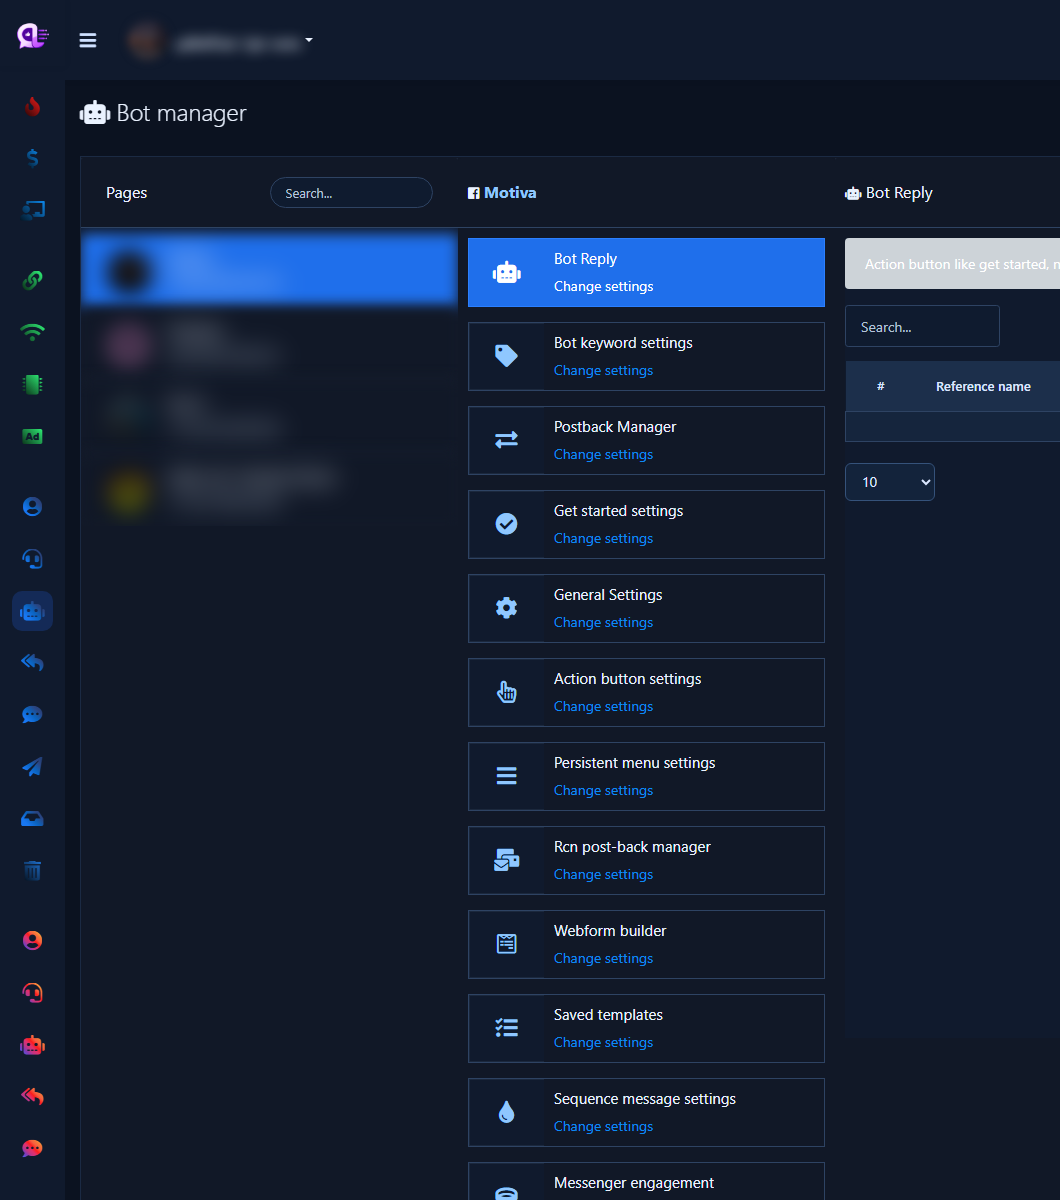
Sidebar path: Facebook Tools → Bot manager. On screen: select the Page, open Get started settings → panel Get started & welcome message, then edit the full template from Action button settings → Get-started Template.
Before you start (prerequisites)
- Sidebar: Integrations → Connect Accounts. Confirm the Page appears under Page list.
- Turn on Enable Bot Connection for that Page (plug icon). Without it, Get Started will not appear. Walkthrough: Connect Facebook and enable the bot.
- Draft a short welcome: who you are, what you offer, and the next action (type “prices” or tap “Talk to an agent”).
- If you will add Buttons or Quick Replies in the flow, prepare short labels first.
1) Open Bot manager and select the Page
- Sidebar: Facebook Tools → Bot manager.
- Select the Facebook Page from the account list (prefer a clean Page such as صفحة اختبار) and wait for the settings cards to load.
- You will see Get started settings and Action button settings. The note above Bot Reply explains that action buttons like Get started and No match live under Action button settings.
- Confirm the correct Page before editing — templates are per Page.
2) Enable Get Started from Get started settings
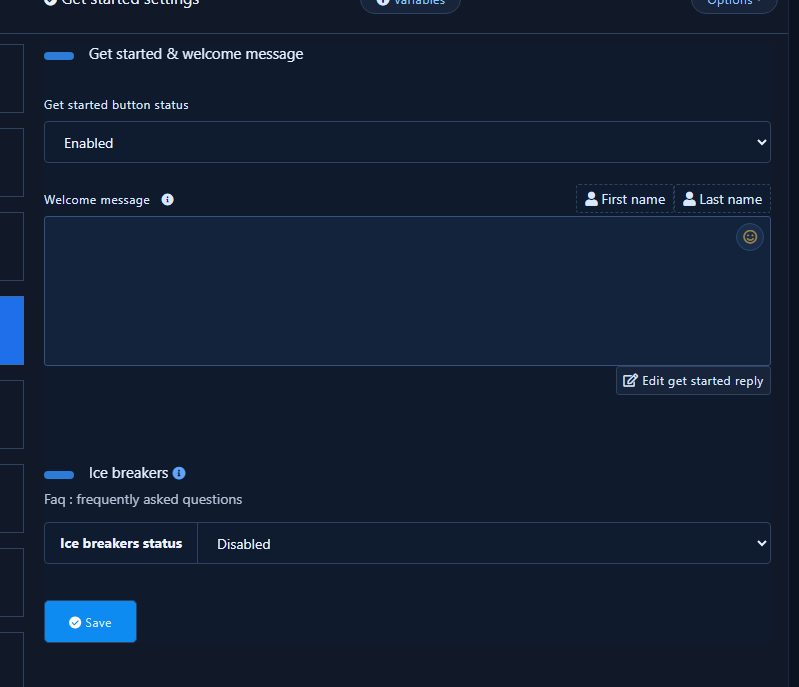
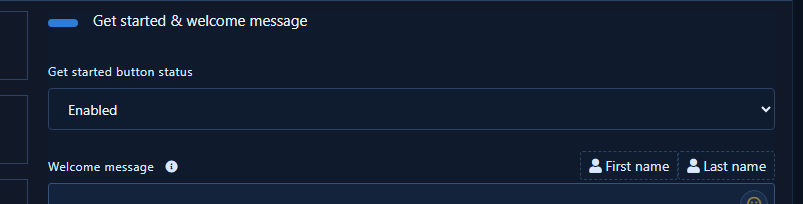
On the live UI, enabling is a dropdown Get started button status inside the Get started & welcome message panel — not a separate one-click “Enable get started” toolbar button.
- Click Change settings on the Get started settings card.
- The panel title is Get started & welcome message.
- Set Get started button status to Enabled. If it shows Disabled, customers will not see the button.
- Optional in the same panel: write a short Welcome message and use First name / Last name tags. This complements the full flow template — it does not replace Get-started Template when you need buttons and branches.
- Below the welcome field, Edit get started reply opens the reply/flow editor directly (alternate path to the template without the action-button grid).
- Lower on the panel: Ice breakers with Ice breakers status (Enabled/Disabled). Full ice-breaker setup: Ice breakers.
- Click Save at the bottom of the panel and wait for confirmation.
3) Open Get-started Template (Visual Flow Builder)
The message after the customer taps Get Started is edited in the full template. Two paths reach roughly the same editor:
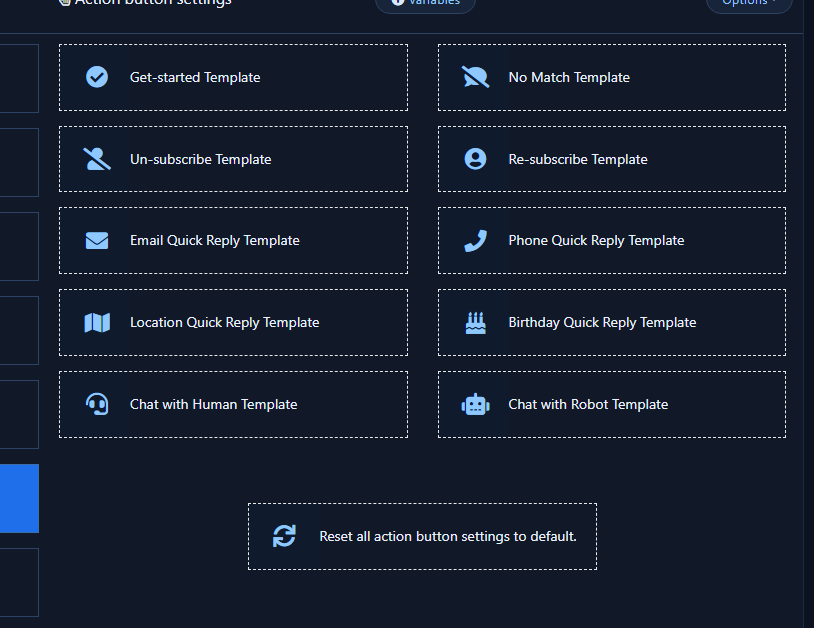
- Path A (documented default): Action button settings → Change settings → Get-started Template.
- Path B: From Get started & welcome message, click Edit get started reply.
- Open Action button settings → Change settings.
- In the template grid click Get-started Template (label stays English). Nearby cards include No Match Template.
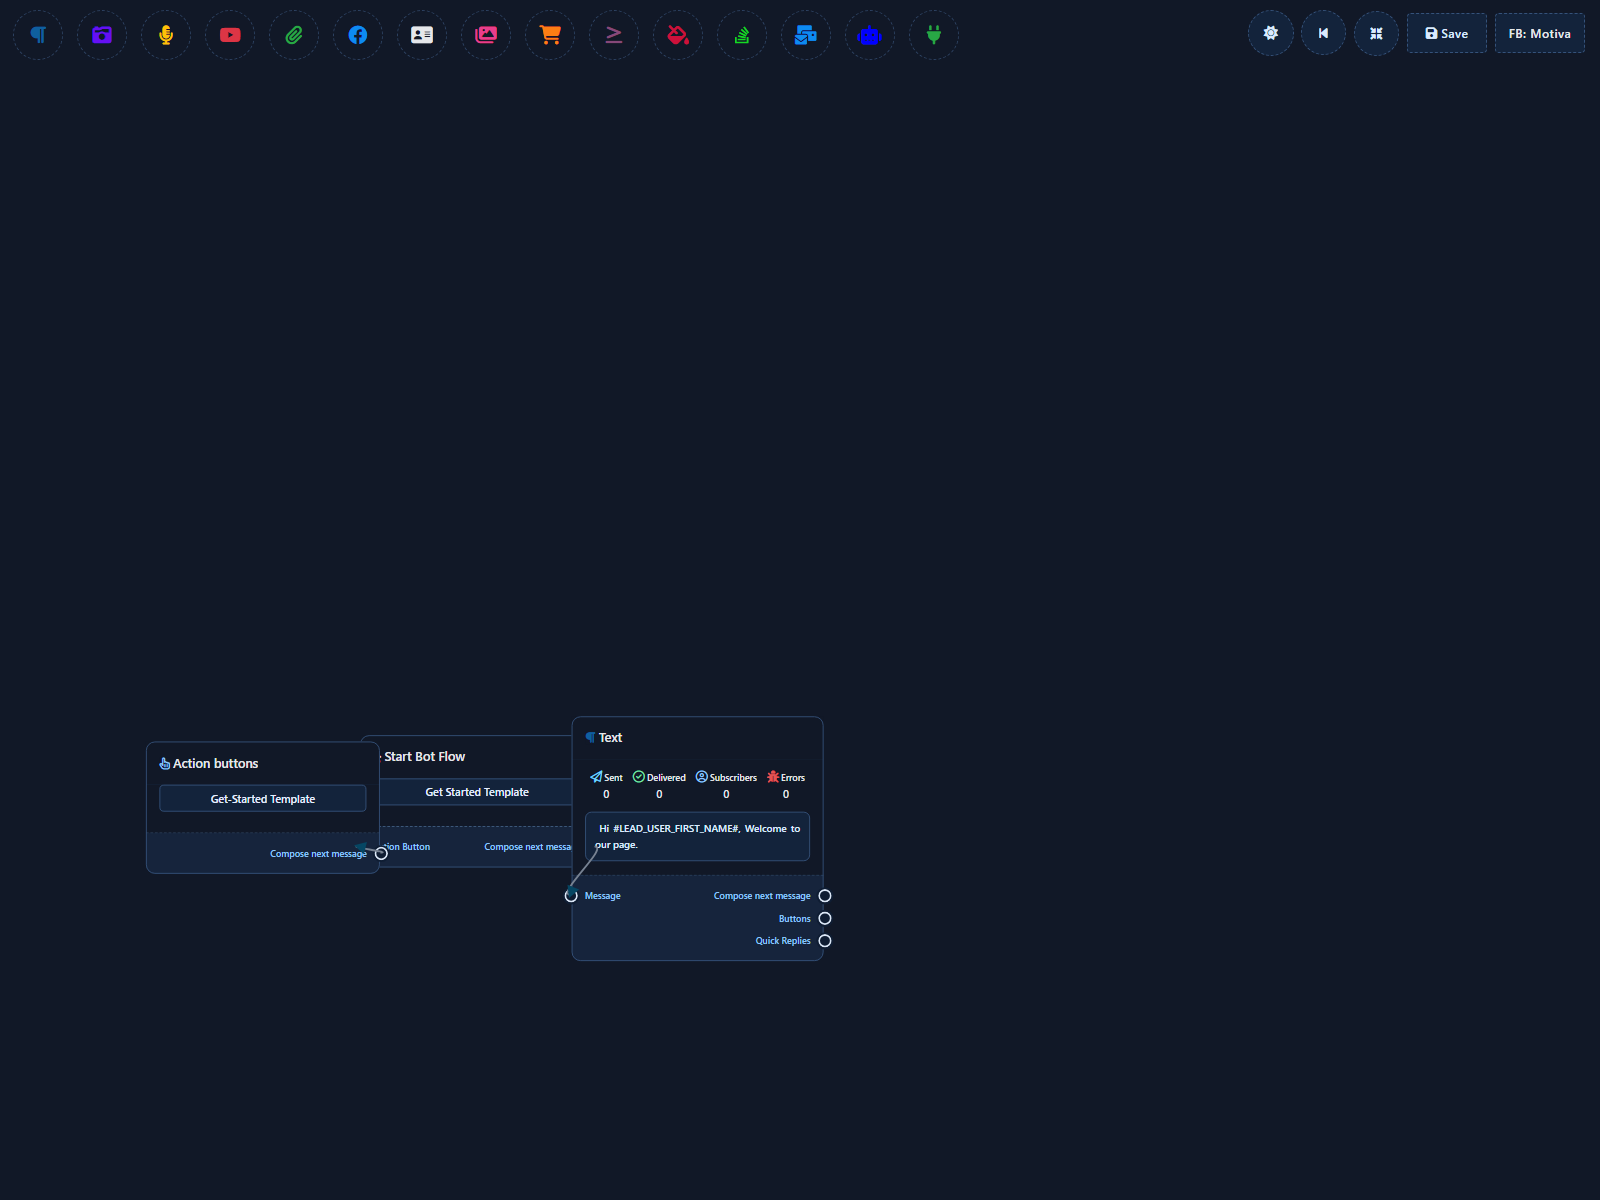
- Visual Flow opens: an Action buttons node with Get-Started Template, then Start Bot Flow, then a Text node for the message.
4) What to put in the template (copy, Buttons, Quick Replies, Save)
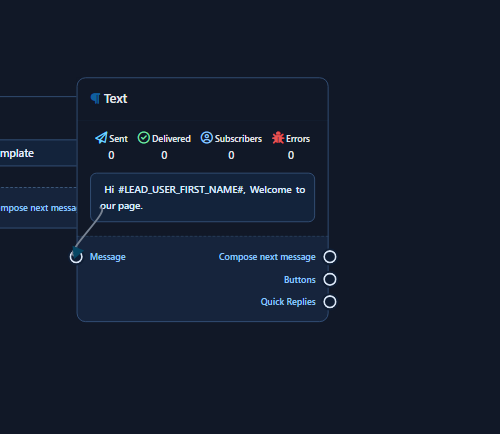
- In the Text node, edit the message. Demo default is often
Hi #LEAD_USER_FIRST_NAME#, Welcome to our page.Replace it with your brand copy.#LEAD_USER_FIRST_NAME#inserts the first name. - Suggested structure: intro + value + clear next step (example: “Welcome to [Page name]. We help with orders and pricing. Type “prices” or tap a button below.”).
- From the Text node outputs choose Buttons or Quick Replies (or Compose next message for another step). Add two or three labels such as “Prices”, “Delivery”, “Talk to an agent”.
- Keep the first message short; put detail in later steps or keywords.
- Click Save at the top of the builder (near the page chip such as FB: صفحتك), wait for confirmation, then return to the Page cards.
5) Test in Messenger
- Use a Messenger account that has never tapped Get Started on this Page (or delete the thread / use a fresh test account).
- Open a new chat with the Page and tap Get Started.
- Confirm the saved Text node message (and Buttons/Quick Replies) arrive.
- If an old message appears: re-check Save in Visual Flow, confirm Get started button status is Enabled and saved, and confirm you edited the same Page that has Bot Connection on.
Practical tips
- After Get Started, configure Facebook No Match and enable Reply if no match found in General Settings.
- Ice breakers sit on the same Get started & welcome message panel — see Ice breakers. Meta may prioritize conflicting profile elements.
- A Persistent menu usually requires Get started button status Enabled first.
Common mistakes
- Leaving Get started button status on Disabled after editing the flow.
- Editing only the short Welcome message when you need Buttons/paths in Get-started Template.
- Editing the template for the wrong Page.
- Mixing this path with Instagram Ice breakers.
Related: Connect Facebook and enable the bot · Facebook No Match · Ice breakers.


